For serious architects and meticulous crafters in Minecraft, the dream of perfectly replicating complex designs or constructing colossal structures with absolute precision once felt like a distant fantasy. That is, until tools like Litematica came along. In this comprehensive guide, we'll dive deep into the Litematica 1.21.8 Overview & Key Features, exploring how this client-side schematic mod transforms your building experience from tedious guesswork to guided mastery. If you're ready to elevate your creative mode builds, streamline resource gathering, and eradicate common construction errors, you've found your ultimate blueprint.
At a Glance: Litematica 1.21.8 Essentials
- What it is: A powerful client-side schematic mod for Minecraft, primarily for creative mode and building assistance.
- Core Purpose: Provides in-game visual guides to help you build structures block-by-block with accuracy.
- Key Innovations: Features holographic blueprints, dynamic material lists, a schematic verifier, and a robust creative-mode helper toolbox.
- Version Focus: This guide covers Litematica 1.21.8, showcasing its capabilities and installation for the latest Minecraft iterations.
- Mod Loader: Primarily uses Fabric, with historical support for LiteLoader and Rift, and Forge versions for specific Minecraft versions.
- Why You Need It: Reduces build time, minimizes errors, and makes large-scale projects far more manageable.
More Than a Ghost: Understanding Litematica's Core Power
At its heart, Litematica isn't just another mod; it's an indispensable co-builder. This client-side schematic tool takes the guesswork out of Minecraft construction, offering a precise visual overlay of your desired structure directly in your game world. Whether you're reconstructing an ancient temple or perfecting a complex redstone contraption, Litematica acts as your intelligent guide, ensuring every block lands exactly where it should.
Born from the legacy of classic Schematica features, Litematica carries forward the best elements of its predecessor, with one notable exception: the printer function. This deliberate design choice keeps the core mod lean and focused on building assistance, leaving printer functionalities open for future extension mods, allowing for a more modular and customizable experience. Primarily leveraging mod loaders like Fabric (especially for 1.14+ versions), it also boasts compatibility with LiteLoader (1.12.x) and Rift (1.13.x), alongside a Forge version available for 1.12.2 and ongoing plans for 1.14.4+. This broad support means many builders can integrate Litematica into their preferred Minecraft setup.
The Builders' Edge: Why Litematica 1.21.8 is a Game Changer
Every iteration of Litematica refines an already impressive toolset, and version 1.21.8 is no exception. This particular release continues to provide robust, precise, and highly customizable building assistance, solidifying its status as a must-have for anyone serious about Minecraft architecture and engineering. What makes this version so significant isn't just its stability or compatibility with newer Minecraft versions, but its comprehensive suite of features designed to tackle virtually every building challenge you might encounter.
From ensuring structural integrity to optimizing resource flow, Litematica 1.21.8 isn't merely about placing blocks; it's about building smarter, faster, and with unparalleled accuracy.
Unpacking Litematica 1.21.8's Core Features
Let's delve into the specific functionalities that make Litematica 1.21.8 an essential component of any serious builder's toolkit. Each feature is designed to address a particular challenge in the building process, culminating in a seamless and highly efficient workflow.
Holographic Blueprints: Your In-Game Ghost Builder
Imagine having a transparent, three-dimensional model of your entire structure floating precisely where you intend to build it. That's the magic of Litematica's holographic blueprints. These precise in-game guides provide an undeniable advantage, allowing you to see exactly where each block needs to go before you even place it. This visual clarity drastically reduces misplacements, saving you precious time and resources often lost to dismantling and re-building errors. For intricate designs, complex facades, or large-scale projects, this feature alone makes Litematica indispensable, transforming conceptual designs into tangible realities with pinpoint accuracy.
Configurable Overlay: Spotting Every Pixel of Discrepancy
Even with holographic guidance, human error can creep in. This is where Litematica's configurable overlay becomes your sharp-eyed assistant. This dynamic HUD doesn't just show you what should be there; it actively highlights what isn't, what shouldn't be, or what's simply wrong. Missing blocks appear distinctly, extra blocks are flagged, and incorrectly placed blocks are visually marked, often in customizable colors. This real-time feedback loop is invaluable for quality control, especially in redstone or technical builds where a single misplaced block can render an entire mechanism dysfunctional. You can tailor the overlay to your preferences, ensuring it provides the most useful visual cues without becoming distracting.
Material List Mastery: Never Miss a Block Again
Resource management is a massive part of any large Minecraft project. Litematica tackles this head-on with its intuitive Material List Mastery. This feature provides a clear, on-screen display of all the materials required for your current build. It tracks both the total needed and what you currently possess, updating dynamically as you place blocks. No more frantic trips back and forth to your storage, wondering if you have enough of a specific type of plank or stone. The material list streamlines resource collection, allowing you to gather everything you need efficiently before diving into construction, keeping your focus on the building itself.
Schematic Verifier: The Ultimate Quality Control
For builders who demand perfection, particularly in the realm of technical or redstone builds, the Schematic Verifier is a non-negotiable feature. This powerful tool scans the area where your schematic is loaded, comparing the actual blocks in the world against the blueprint. It meticulously identifies any errors or discrepancies, highlighting even the smallest deviation. This is crucial for troubleshooting complex circuits or ensuring that intricate structural elements are perfectly aligned. Before you flip the switch on your redstone contraption or declare your mega-build complete, a run with the Schematic Verifier can prevent countless headaches and ensure flawless operation.
Creative-Mode Helper Toolbox: Instant Build Manipulation
While Litematica excels at guiding survival-mode construction, it truly shines in creative mode with its Helper Toolbox. This suite of powerful tools allows for direct manipulation of your schematic placement within the game world, significantly accelerating the building process. Functions like Fill, Replace, Delete, and Paste become accessible, allowing you to instantly populate large areas, swap out block types, remove unwanted sections, or even paste entire schematics with a few clicks. In single-player creative worlds, this means instant gratification. For multiplayer servers, these tools can often be utilized through /setblock commands, translating your intricate designs into reality with remarkable speed and efficiency.
Getting Started: Installing Litematica 1.21.8
Before you can unleash Litematica's full potential, you'll need to get it properly installed. While the process is straightforward, following these steps ensures a smooth setup.
Prerequisites: Fabric Mod Loader
Litematica, especially for newer Minecraft versions (1.14+), relies heavily on the Fabric Mod Loader. This lightweight and flexible modding API provides the necessary framework for Litematica to function seamlessly.
- Download & Install Fabric: Visit the Fabric website and download the installer. Run the installer with Java, ensuring you select the correct Minecraft version, then click "Install." This sets up the Fabric profile in your Minecraft launcher.
Download Litematica
- Download Litematica: Head to the official Litematica download page (often on CurseForge or similar mod distribution sites) and download the Litematica mod file for your specific Minecraft version (e.g., 1.21.8 for Minecraft 1.21.8). You'll also need to download
malilib, which is a dependency for Litematica.
Seamless Integration: Placing the Mod File
- Install Litematica: Once both the Litematica
.jarandmalilib.jarfiles are downloaded, you need to place them in your Minecraftmodsfolder.
- Open the 'Run' program on Windows by pressing
Windows Key + R. - Type
%appdata%and press Enter. - Navigate to the
.minecraftfolder. - Inside
.minecraft, locate a folder namedmods. If it doesn't exist, simply create one. - Drag and drop both the Litematica and
malilib.jarfiles into thismodsfolder.
Launching Your Litematica-Enhanced Minecraft
- Open Minecraft Launcher & Select Fabric Profile: Open your Minecraft launcher. Next to the 'Play' button, click the up arrow to reveal your profiles. Select the 'Fabric Loader' profile that was created during step 1, and then click 'Play'. Minecraft will now launch with Litematica integrated, ready for action!
Mastering Litematica's Interface and Basic Navigation
With Litematica installed, understanding its core controls and settings is your next step to becoming a building maestro. The mod uses its own unique keybind system, separate from vanilla Minecraft, which offers greater customization.
Accessing the Mod & Configuration
The gateway to Litematica's features is its main menu.
- By default, you can open the main menu with the
Mkey (or,on AZERTY keyboards). - To access the config GUI, which houses all settings and hotkey configurations, press
M + C(or, + C).
Litematica utilizesmalilib's custom keybind system, which is powerful but different from vanilla controls. All hotkeys can be configured and remapped viaM + C -> Hotkeys. Take some time to familiarize yourself with these, as custom keybinds significantly speed up your workflow.
Troubleshooting Common Rendering Glitches
Occasionally, especially with newer Minecraft versions or specific graphics card drivers, you might encounter rendering issues, such as glitchy triangles in your schematic overlays. Here's how to address them:
- For 1.16+ Versions:
- Update Litematica: Ensure you are running the latest compatible version of Litematica. Developers often push fixes for rendering bugs.
- Disable Shaders: Set your in-game shaders to
OFF(not just "Internal"). Restart your game afterward. Shaders can sometimes conflict with Litematica's rendering engine. - Disable Fast Render: If issues persist, go into your Minecraft video settings and disable
Render RegionsandFast Render. These performance optimizations can sometimes interfere with modded rendering.
Your First Schematic: Capturing Your Creations
One of Litematica's primary functions is to allow you to create schematics from existing builds. This is how you immortalize your own designs or capture sections of a world to replicate elsewhere.
Setting Up Your Selection Area
- Switch to Area Selection Mode: Open the main menu (
M) and locate theArea Selectionbutton. Click it to enter this mode. Alternatively, if you have the default "tool item" (a stick) in your hand, you can holdCtrland use your mouse wheel to cycle through Litematica's various tool modes, selectingArea Selection. - Choose a Mode:
- For a single, contiguous box selection, use
Simplemode. - For multiple, distinct sub-regions within a larger schematic, opt for
Normalmode.
Defining Corners with the Tool Item
- Define Your Area: With the "tool item" (default: stick) in your hand:
Left-clickon a block to set the first corner of your selection.Right-clickon another block to set the second corner, defining the volume.- Precision Placement:
Sneak-click(hold Shift and click) to place corners next to blocks, rather than on them, which is useful for selecting the exact outer boundary of a structure. - Normal Mode Selection: In
Normalmode,Middle-click(mouse wheel click) allows you to select a specific corner or sub-region you want to modify. - Nudging for Fine-Tuning: Hold
Altand use your mouse scroll wheel to subtly nudge the currently selected corner or the entire bounding box, providing pixel-perfect adjustments.
The Power of Expand Mode
- Alternative Selection with Expand Mode: For quickly selecting entire structures,
Expandmode is highly efficient.
- Enable
Expandmode (often viaCtrl + Mor by navigating to the Generic config tab in the main menu). Right-clickon a block to reset any current selection.Left-clickat the edges of your build to expand the selection outwards until it encompasses the entire structure. This intelligently detects contiguous blocks.
Refining Your Selection with the Area Editor
- Using the Area Editor GUI: For more complex selections, especially with multiple sub-regions, the
Area Editor GUIis invaluable (default hotkey:Numpad Multiply). This graphical interface allows you to:
- Create new sub-regions within your schematic.
- Rename existing sub-regions for better organization.
- Adjust the exact coordinates and dimensions of each sub-region with numerical precision.
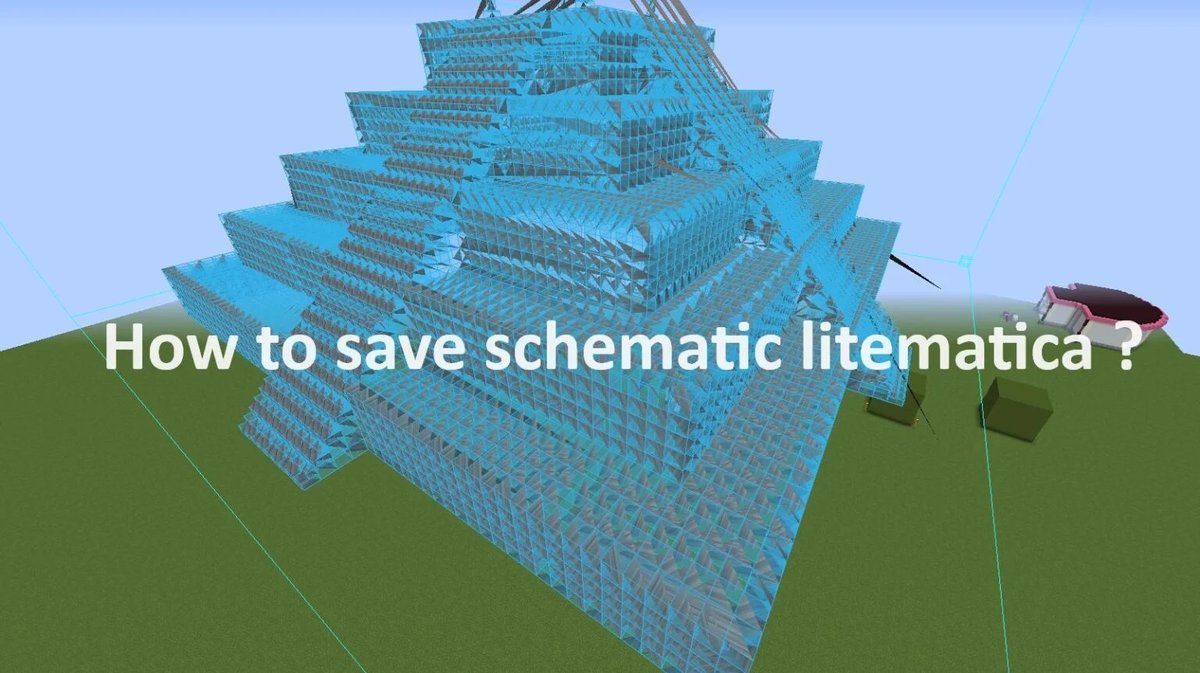
Saving Your Masterpiece
- Save Your Selection: Once your selection is perfectly defined, save it as a schematic. You can do this via a configured hotkey or through the
Area Editor GUI.
- Important Note: For very large selections, you might need to physically move around the area you've selected to ensure all chunks within the selection are fully loaded before saving. This prevents parts of your schematic from being empty or incomplete.
Bringing Schematics to Life: Loading & Placing
Once you have a schematic file, Litematica truly shines by allowing you to load and precisely place it in your world as a guide.
Loading Your Chosen Blueprint
- Access the Load Schematics Menu: Open the main menu (
M) and navigate toLoad Schematics. - Enable Placement Creation: Crucially, ensure that the
Create Placementoption is enabled. This tells Litematica to generate a holographic placement of the schematic once loaded. - Select and Load: Browse through your list of available schematics, select the one you want, and click
Load. Your blueprint will now appear in the world.
Positioning Your Schematic with Precision
- Switch to Schematic Placement Tool Mode: Just like
Area Selection, you'll need to be in the correct tool mode. Use your "tool item" (stick) andCtrl + mouse wheelto selectSchematic Placementmode. - Move and Position:
- With the tool item in hand,
clickon a block to move the schematic's origin to that position. - For fine adjustments, hold
Altand use yourmouse scroll wheelto nudge the entire placement along the axes. This allows for precise alignment with existing structures or terrain.
Rotation, Mirroring, and Locking Placements
- Configure Your Placement: To rotate, mirror, or otherwise manipulate your loaded schematic, open the
Schematic Placementsmenu (M -> Schematic Placements). Then, select the specific placement you want to modify and clickConfigure. Alternatively, use the default hotkeyNumpad Minusto open this configuration GUI directly. - Rotate and Mirror: Within this GUI, you'll find options to rotate the schematic around different axes or mirror it (flip it). Experiment with these to get the exact orientation you need.
- Locking for Stability: Once your schematic is perfectly positioned, use the
Lockoption on this GUI. Locking the placement prevents accidental movement or rotation, ensuring your guide stays put while you build.
Multiple Placements from a Single Schematic
Sometimes, you need to replicate a single schematic multiple times – perhaps a series of identical houses or a repeating pattern.
- After loading a schematic once, you don't need to load the file again. Go to the
Loaded Schematics menu(M -> Loaded Schematics), select the schematic, and clickCreate placement. This generates a new, independent holographic copy of the schematic, which you can then move and configure separately.
Navigating Layers: Rendering Specific Sections
For extremely tall or complex builds, seeing the entire schematic at once can be overwhelming. Litematica offers powerful layer rendering controls:
- Access Render Layers Config: Go to the
Render Layersconfig tab within the main configuration GUI (M + C). - Cycle Through Layers: Use the hotkeys
M + Page UpandM + Page Downto cycle through different vertical layers of your schematic. This lets you focus on one floor or section at a time. - Move Layer to Player: The
M + Homehotkey will instantly adjust the visible layer to your current Y-level, making it easy to see exactly what you need to build at your current height. - Nudge Individual Layers: For even finer control, use
Page UpandPage Down(withoutM) to nudge the visible layer up or down by a single block, allowing you to perfectly match your building progress.
Advanced Schematic Manipulation: The Edit Schematic Mode
Litematica isn't just for following blueprints; it also allows you to interact directly with the schematic itself, modifying it on the fly. This Schematic Rebuild mode (now commonly referred to as Edit Schematic) is a powerful feature for refining designs or making quick changes.
Breaking and Placing Blocks Within the Schematic
In Edit Schematic mode, using the "tool item" without any modifier keys allows for direct interaction:
- Punch to Break:
Left-click(punch) a block within the holographic schematic to "break" it from the blueprint. This doesn't affect the world, only the schematic representation. - Place to Add:
Right-clickwith a block in your hand onto the schematic to "place" that block into the blueprint. This is fantastic for making small adjustments or adding missing details to a loaded schematic before saving it as a new version.
Directional Editing for Continuous Lines
To modify blocks in continuous lines or planes within the schematic, utilize modifier keys:
- Modifier Keys (Direction Variant): When you hold down specific modifier keys (often configurable in your hotkeys), Litematica will display a 5-way overlay. This overlay helps you break, place, or replace blocks in lines extending from your click point – useful for rapidly editing walls, floors, or roofs within your schematic without individually clicking each block.
Global Block Replacement
For larger-scale changes, such as swapping out an entire material type across your schematic, Litematica offers a powerful global replacement function:
- Modifier Keys (All Variant): With certain modifier keys held down, you can configure Litematica to break or replace all identical blocks of a specific type within the schematic.
- Targeted Replacement: To execute a global replacement, you'll need to set a keybind for
schematicRebuildReplaceAllin your hotkey configuration. Hold this key, thenRight-clickwith the new block in your hand on the existing block type in the schematic you wish to replace. Litematica will then swap out all instances of the original block with your new one. This can be further limited by yourRender Layersor sub-region selection, ensuring you only affect the desired parts of your blueprint. This is incredibly efficient for changing a build's material palette or correcting widespread block choices.
Common Questions About Litematica
Even with a detailed guide, new users often have specific questions. Here are some of the most frequently asked:
How do I load existing schematics into Litematica?
To load any .schematic files you've downloaded or created (e.g., from other builders or previous projects), simply place them directly into your .minecraft/schematics/ folder. Once they are there, open Minecraft, go to Litematica's main menu (M), and select Load Schematics. Your files should appear in the list, ready to be loaded into your world.
Can I move or rotate loaded schematics?
Absolutely. Once a schematic is loaded as a "placement," you have full control over its position and orientation. Open the placement configuration menu (M -> Schematic Placements -> Configure or the Numpad Minus hotkey). From this menu, you can select your placement and use the on-screen options to rotate it along any axis or mirror it. For movement, switch to Schematic Placement tool mode with your "tool item" (default: stick), then click to move its origin or use Alt + mouse scroll to nudge it for precise positioning.
Where can I find help or connect with the Litematica community?
Litematica boasts a very active and helpful community. The best places to find support, ask questions, or connect with other users are usually the official Litematica Discord server (often linked from its official download pages or creator's social media), relevant Minecraft modding forums, or the GitHub repository for technical issues. These platforms are excellent for troubleshooting, sharing tips, and discovering new ways to use the mod.
How often is Litematica updated, and for which Minecraft versions?
The developers behind Litematica are known for their commitment to keeping the mod up-to-date. They regularly push updates to ensure compatibility with the latest major Minecraft versions as well as to fix bugs and introduce new features. While specific release schedules vary, you can generally expect Litematica to support new Minecraft versions shortly after their official release, making it a reliable tool for long-term building projects. Always check the official download page for the most current version.
The Future of Your Minecraft Builds with Litematica
Litematica 1.21.8 isn't just a mod; it's a paradigm shift for serious Minecraft builders. It transforms the often-tedious process of construction into a guided, precise, and highly efficient endeavor. By providing holographic blueprints, intelligent material tracking, and robust error checking, Litematica empowers you to tackle projects of any scale with confidence. No longer will you dread massive builds or complex redstone circuits; instead, you'll approach them with the tools and assurance of a seasoned professional.
So, download Litematica, familiarize yourself with its powerful features, and watch as your Minecraft building skills reach new, unimaginable heights. The only limit is your imagination.
Untuk pemahaman lebih lengkap, baca panduan utama kami: Litematica 1.21.8 main guide