Transforming your Minecraft building experience with advanced schematic tools has never been easier. If you're looking to bring unparalleled precision and efficiency to your block-by-block creations, Installing Litematica for Minecraft 1.21.8 is your essential next step. This powerful mod turns complex blueprints into interactive in-game guides, letting you build intricate structures with ease and accuracy.
No more counting blocks or re-watching tutorials countless times; Litematica overlays a translucent "ghost" of your desired build directly into your world, showing you exactly where every block goes. It's a game-changer for builders, architects, and anyone who's ever dreamed of replicating a magnificent design without the headache of constant reference switching.
At a Glance: Your Quick Roadmap to Litematica
- What it is: A Minecraft Java Edition mod that provides in-game schematic overlays for precise building.
- Why you need it: Enhances building precision, saves time, reduces errors, and visualizes complex structures.
- Key Requirement: Requires a mod loader (Fabric or Forge) compatible with Minecraft 1.21.8.
- The Process: Install your chosen mod loader, download the Litematica
.jarfile, place it in yourmodsfolder, and launch Minecraft. - Crucial Step: Always back up your Minecraft worlds before installing any mods!
- Post-Installation: Verify in-game, then explore Litematica's intuitive menu for loading, positioning, and building schematics.
Decoding Litematica: More Than Just a Blueprint
Before we dive into the nitty-gritty of installation, let's briefly unpack what Litematica brings to your Minecraft toolkit. At its heart, Litematica is a schematic viewer that allows you to load, display, and interact with complex structures directly within your Minecraft world. Think of it as an augmented reality overlay for your builds.
It presents these structures as translucent wireframe models – often called holograms or ghost outlines – that show you the exact placement of every block. This isn't just for viewing; it's an interactive guide, layer by layer, block by block.
Key Benefits You'll Unlock:
- Precision Perfected: Load detailed schematics to accurately replicate complex designs, ensuring every block is in its rightful place. This saves immense time and drastically cuts down on errors.
- Crystal-Clear Visualization: See your build before you even place the first block. Real-time holograms eliminate guesswork and make spatial planning a breeze.
- Collaborative Creativity: Create your own schematics, share them with friends, or download designs from the community, fostering a new level of collaborative building.
- Efficient Workflow: By visualizing the entire build process in advance, you minimize trial-and-error, making large-scale projects significantly more streamlined.
- Customization at Your Fingertips: Adjust colors, opacity, and other visual settings to perfectly match your building style and preferences.
In essence, Litematica transforms Minecraft from a game of spontaneous construction into a platform for precise, planned architectural marvels.
Essential Gear-Up: What You Need Before Starting
Like any major construction project, installing Litematica requires a few prerequisites to ensure a smooth setup. Taking a moment to confirm these foundational elements will save you potential headaches down the line.
1. Confirm Your Minecraft Version: 1.21.8
This guide specifically targets Minecraft Java Edition 1.21.8. It's crucial that your game matches this version number, as mods are highly version-specific. You can usually see your Minecraft version prominently displayed on the main menu of your launcher. If you're running an older version, you'll need to update it through your Minecraft Launcher.
2. Choose Your Mod Loader: Fabric or Forge
Litematica doesn't run natively in Minecraft; it needs a "mod loader" to function. Both Fabric and Forge are popular choices, each with its own ecosystem of compatible mods. For Minecraft 1.21.8, Fabric is generally the more frequently updated and often recommended for newer versions, though Forge is catching up.
- Fabric: Known for being lightweight and modular, often preferred for modern Minecraft versions.
- Forge: The long-standing veteran, with a vast library of older mods.
Choose one, but not both, for your installation. The installation steps will be similar, but the files you download for Litematica itself will be specific to your chosen loader.
3. Verify Your Java Environment
Minecraft Java Edition, and by extension, its mods, rely on a compatible Java Runtime Environment (JRE). For Minecraft 1.21.8, you'll typically need Java 17 or newer. Most modern Minecraft launchers handle Java versions automatically, but it's good practice to ensure you have an up-to-date JRE installed on your system. You can verify your Java version by opening your command prompt (Windows) or terminal (macOS/Linux) and typing java -version.
4. The Golden Rule: Back Up Your Worlds!
This cannot be stressed enough. Before you install any mod, always back up your Minecraft worlds and configuration files. Mods can sometimes conflict or cause unforeseen issues, and the last thing you want is to lose hours of hard work.
- How to backup: Navigate to your
.minecraftfolder (more on finding this below), locate thesavesfolder, and copy its entire contents to a safe location outside of your.minecraftdirectory. You might also want to back up yourresourcepacksandoptions.txtfiles.
An adequate internet connection is also a given, as you'll be downloading several files. With these prerequisites confirmed, you're ready to get started. Don't skip these steps; they're the foundation of a stable modded Minecraft experience.
Step-by-Step Installation: Bringing Litematica to Life
Now, let's get down to the actual installation process. Follow these steps carefully, paying close attention to version compatibility at each stage.
Step 1: Install Your Chosen Mod Loader (Fabric or Forge)
This is the backbone of your modded Minecraft setup. You must install a mod loader that is compatible with Minecraft 1.21.8.
For Fabric:
- Download the Fabric Installer: Head to the official Fabric website (
fabricmc.net). - Run the Installer: Once downloaded, run the
fabric-installer-X.X.X.jarfile. - Select Minecraft Version: In the installer window, make sure
1.21.8is selected under "Minecraft Version." - Click "Install": The installer will create a new Fabric profile in your Minecraft launcher.
- Install Fabric API (Crucial for many Fabric Mods): For almost any Fabric mod, including Litematica, you'll also need the Fabric API. Visit a trusted mod repository like CurseForge or Modrinth, search for "Fabric API," and download the
.jarfile specifically for Minecraft 1.21.8. Save this.jarfile alongside where you'll put Litematica.
For Forge:
- Download the Forge Installer: Go to the official Forge website (
files.minecraftforge.net). - Select 1.21.8: On the left sidebar, navigate to the
1.21.8version. - Download the "Installer": Click on "Installer" to download the
.jarfile. - Run the Installer: Execute the downloaded
forge-X.X.X-installer.jarfile. - Select "Install Client": Ensure "Install Client" is selected and click "OK." Forge will set up its profile in your Minecraft launcher.
Verification: After installation, open your Minecraft Launcher. In the versions dropdown menu (usually next to the "Play" button), you should see a new profile named "Fabric Loader 1.21.8" or "Forge 1.21.8." Select this profile, but don't launch the game just yet.
This initial setup ensures your Minecraft environment is ready to accept modifications. If you're encountering issues with this step, you might find more detailed guidance in a dedicated guide on installing Minecraft mod loaders.
Step 2: Download Litematica and its Dependencies
Now for the main event: getting the Litematica mod itself. You'll also need to download a couple of other mods that Litematica relies on to function correctly. These are known as dependencies.
- Visit Trusted Mod Repositories: Head to CurseForge (
curseforge.com) or Modrinth (modrinth.com). These are the most reliable sources for mod downloads. - Search for "Litematica": Find the Litematica mod page.
- Locate the Correct Version: This is critical. Look for the
.jarfile that explicitly states:
- Minecraft 1.21.8
- Your chosen mod loader (Fabric or Forge)
- For example: "litematica-fabric-1.21.8-X.X.X.jar" or "litematica-forge-1.21.8-X.X.X.jar".
- Download Litematica: Click to download the
.jarfile. Save it to an easily accessible folder, perhaps "Minecraft Mods" on your desktop. - Download Dependencies: Litematica typically requires other "malilib" library mods from the same developer (Masa). On the Litematica download page, look for a "Dependencies" section.
- For Fabric: You'll almost certainly need
malilib(specifically the Fabric version for 1.21.8). If you didn't getFabric APIin Step 1, download it now. - For Forge: You'll likely need
malilib(the Forge version for 1.21.8). - Important: Always download the exact version of
malilibthat is listed as a dependency for your specific Litematica file. Mismatched dependency versions are a common cause of mod issues.
You should now have 2-3.jarfiles: Litematica,malilib, and potentially Fabric API (if using Fabric).
Step 3: Install Litematica Mod
With your mod loader installed and your Litematica files downloaded, it's time to place them in the correct location.
- Locate Your Minecraft
modsFolder: This is where Minecraft looks for its mods.
- The Easiest Way: Open your Minecraft Launcher, select your Fabric or Forge profile, click "Installations," then hover over your profile and click the folder icon that appears. This will open your
.minecraftdirectory. - Manual Navigation (Windows): Press
Win + R, type%appdata%, and press Enter. Then open the.minecraftfolder. - Manual Navigation (macOS): Open Finder, press
Cmd + Shift + G, type~/Library/Application Support/minecraft, and press Enter. - Manual Navigation (Linux): Navigate to
~/.minecraft.
- Find or Create the
modsFolder: Inside your.minecraftdirectory, you should see a folder namedmods. If it doesn't exist, simply right-click in the empty space and create a new folder namedmods(all lowercase). - Drag and Drop the
.jarFiles: Move all the.jarfiles you downloaded (Litematica,malilib, and Fabric API if applicable) into thismodsfolder. Do not extract them; keep them as.jarfiles.
This folder is the magic box where all your installed mods reside.
Step 4: Verify the Installation
The moment of truth!
- Launch Minecraft: Open your Minecraft Launcher, ensure you have selected the correct Fabric Loader or Forge profile for 1.21.8, and click "Play."
- Check the Mods Menu: Once Minecraft has loaded to the main menu, look for a "Mods" button (this is usually added by the mod loader). Click it. Litematica should appear in the list of installed mods.
- In-Game Confirmation: Enter a single-player world. Once loaded, press the default Litematica hotkey, typically
M. This should open the Litematica main menu, displaying options like "Main Menu," "Save & Load," and "Settings." If this menu appears, congratulations – Litematica is successfully installed and ready to use!
If you encounter any issues during this verification phase, don't fret! We'll cover common troubleshooting steps shortly.
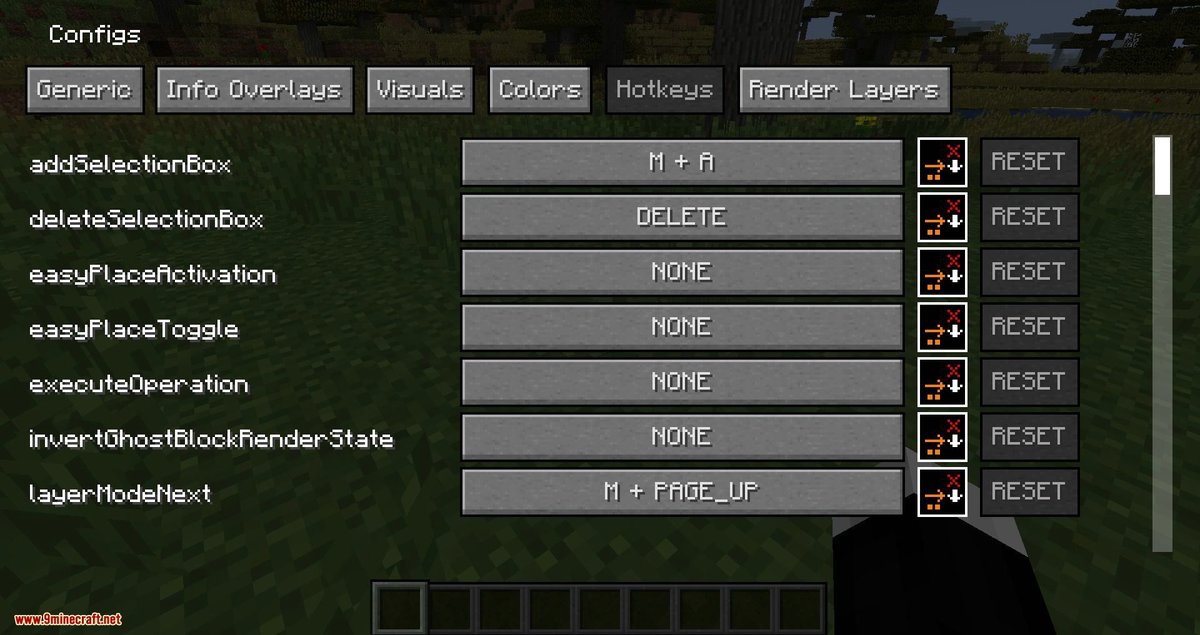
Customizing Your Experience: Configuring Litematica Settings
Litematica isn't just powerful; it's highly customizable. Once installed, you'll want to tweak some settings to optimize performance and tailor the visual experience to your liking.
You can access Litematica's settings either from the Minecraft main menu (Mods -> Litematica -> Configure) or directly in-game by pressing the default M key.
Essential Settings to Explore:
- Schematic Loading Mode:
Quick: Loads schematics faster but might use more memory initially.Lazy: Loads only visible parts, saving memory, but might have slight loading delays when moving around. Experiment to see what works best for your system.- Render Distance: This controls how far away Litematica renders the schematic hologram. Lowering this can improve performance on less powerful systems.
- Show Overlay: Toggles the visibility of the schematic hologram. Useful for quickly hiding it if it's in the way.
- Color Settings: Located under the
Visualstab, you can change the color of the ghost blocks, outline, and error indicators. This is incredibly useful for visibility, especially with different resource packs. - Opacity: Adjust how transparent the schematic hologram appears. Find a balance where it's visible enough to guide you but doesn't obscure the world.
- Line Thickness: Modify the thickness of the wireframe lines for better clarity.
Performance Optimization Tips:
For smoother rendering, especially with large schematics or on older hardware, consider these adjustments:
- Enable VBOs: (Usually in Minecraft's general video settings) This can significantly improve rendering performance.
- Limit Chunk Loading Distance: In Minecraft's video settings, reducing your overall render distance can free up resources for Litematica.
- Adjust Update Rate: Within Litematica's settings, you can often find options to reduce how frequently the schematic updates, balancing responsiveness with performance.
- Allocate More RAM: If you're running many mods or large schematics, allocating more RAM to Minecraft through your launcher settings can prevent crashes and stuttering. Optimizing Minecraft's performance with mods often involves a careful balance of these settings.
Spend some time in a creative test world to play with these options. You'll quickly discover what visual and performance settings work best for your setup and building style.
Mastering the Basics: Using Litematica in Your World
Once Litematica is installed and configured, it's time to put it to work! While Litematica is feature-rich, its core functionality for builders is intuitive.
- Open the Litematica Menu: Press the default hotkey,
M, to open the main schematic menu. - Loading a Schematic:
- From the main menu, go to
Load Schematics. - Browse to find your
.litematicfile (you can place these files directly in your.minecraft/schematicsfolder for easy access). - Select the schematic and click
Load. The ghost outline will appear in your world.
- Positioning Your Schematic:
- The schematic will typically spawn at your current location.
- Press
Magain to open the menu, then navigate toPlacement->Configure. - Use the on-screen controls or default hotkeys (often
Arrow keysfor horizontal movement,Page Up/Page Downfor vertical,Shiftfor fine adjustments, andAltfor rotation) to precisely position your schematic.Goften toggles between free placement and fixed grid snapping. - You can also
MirrororRotatethe schematic to fit your build space.
- Viewing and Building:
- The translucent hologram shows you exactly where to place blocks.
- Many builders use Litematica in conjunction with Creative mode to quickly place blocks or in Survival mode to meticulously gather resources and build.
- The "material list" feature (often accessible through a sub-menu) can even tell you exactly what blocks and how many of each you'll need for the loaded schematic.
- Saving Your Progress:
- If you're creating your own build and want to save it as a schematic, press
M, then go toSave Schematics. - Define a selection area in your world, give your schematic a descriptive name, and save it as a
.litematicfile. This lets you share your creations or rebuild them later.
For a deeper dive into the specifics of loading and manipulating schematics, explore Litematica's in-depth documentation or community guides.
Becoming a Litematica Pro: Tips for Effective Use
Litematica can dramatically change how you build in Minecraft. To get the most out of it, consider these expert tips:
- Master the Keybinds: Litematica has a lot of default hotkeys (
M,Y,P,L, etc.). Familiarize yourself with them, and don't hesitate to customize them in the settings (Controls->Litematica) to suit your workflow. This will significantly speed up your building process. - Organize Your Schematics: As your library grows, organize your
.litematicfiles into descriptive subfolders within your.minecraft/schematicsdirectory. Use clear, descriptive naming conventions (e.g.,Farm_Automatic_Wheat_v2.litematic) to easily find what you need. - Prioritize Performance: If your game feels sluggish with a schematic loaded, try reducing the Litematica render distance, lowering its opacity, or disabling certain overlay features. Don't be afraid to experiment with your graphics settings too.
- Utilize Voronoi Mode: For advanced users, Litematica's Voronoi mode (found in configuration) can highlight differences between your actual build and the schematic, helping you pinpoint missing or incorrectly placed blocks with precision.
- Keep Litematica Updated: Like Minecraft itself, Litematica receives updates that often include new features, performance improvements, and bug fixes. Regularly check for new versions compatible with your Minecraft and mod loader version.
- Practice in Creative Mode: Before tackling a massive survival build, practice loading and positioning schematics in a creative flat world. This allows you to get comfortable with the tools without resource constraints or environmental hazards.
By incorporating these practices, you'll move beyond just installing Litematica and truly begin to leverage its full potential for your Minecraft builds.
When Things Go Sideways: Troubleshooting Common Issues
Even with careful installation, modding can sometimes present challenges. Here’s a quick guide to troubleshooting common Litematica issues:
1. Litematica Isn't Showing Up In-Game
- Check
modsFolder: Double-check that all Litematica-related.jarfiles (Litematica,malilib, Fabric API if needed) are directly inside your.minecraft/modsfolder and not in a subfolder. - Version Mismatch: Ensure every
.jarfile is specifically for Minecraft 1.21.8 and your chosen mod loader (Fabric or Forge). A single mismatched version can prevent the mod from loading. - Mod Loader Installed? Confirm your Fabric or Forge profile appears and is selected in the Minecraft Launcher. Make sure the mod loader itself is correctly installed for 1.21.8.
- Corrupted Download: Try redownloading the
.jarfiles. Sometimes downloads can get corrupted.
2. Minecraft Crashes or Fails to Load
- Check Crash Reports: After a crash, Minecraft usually generates a crash report in
.minecraft/crash-reports. Open the latest one with a text editor. Look for keywords like "Litematica," "malilib," or specific mod names; this can often pinpoint the culprit. - Java Version: Ensure you have an appropriate Java Runtime Environment (JRE) installed for Minecraft 1.21.8 (typically Java 17 or newer). The Minecraft Launcher usually handles this, but manual updates can sometimes cause issues.
- Mod Conflicts: If you have other mods installed, one of them might be conflicting with Litematica or its dependencies.
- Isolation Test: Temporarily remove all mods except Litematica and its direct dependencies (
malilib, Fabric API) from yourmodsfolder. If the game launches, reintroduce your other mods one by one until you find the conflict. - Allocate More RAM: For larger mod packs or resource-intensive operations, inadequate RAM can cause crashes. Increase the allocated RAM for your Minecraft profile in the launcher settings (e.g., 4GB or 6GB, depending on your system's total RAM).
3. Rendering or Display Issues (Ghost Outline Flickering/Invisible)
- Graphics Drivers: Ensure your graphics card drivers are up to date. Outdated drivers are a common cause of rendering glitches.
- Minecraft Graphics Settings: Try lowering your Minecraft video settings (e.g.,
Render Distance,Graphicsto "Fast," disableVSync). - Litematica Settings: Experiment with Litematica's
Render Distance,Opacity, andVBOssettings. - Reinstall Mod: If all else fails, try deleting the Litematica and
malilib.jarfiles from yourmodsfolder and redownloading/reinstalling them.
4. Shader or Texture Pack Conflicts
- Disable Temporarily: If you're using shaders or high-resolution texture packs, temporarily disable them to see if the issue resolves. Some shaders might not play well with mod overlays.
- Compatibility: Check if your shaders or texture packs explicitly state compatibility with modded Minecraft or specific mod loaders.
General Troubleshooting Advice:
- Consult Community Resources: The Litematica official GitHub page, the Fabric/Forge Discord servers, and general Minecraft modding forums are invaluable resources. Often, someone else has experienced and solved your exact issue.
- Read Documentation: The Litematica mod's main page on CurseForge or Modrinth often has a detailed description, including common issues and specific requirements.
- Keep Everything Updated: Ensure your Minecraft, mod loader, Litematica, and all its dependencies (
malilib, Fabric API) are the latest compatible versions.
Remember to take it one step at a time and document any changes you make. Backing up your Minecraft worlds regularly will give you peace of mind during any troubleshooting process.
Unleashing Your Inner Architect with Litematica
You've done it! Installing Litematica for Minecraft 1.21.8 might seem like a handful of steps, but it's a remarkably straightforward process that opens up a world of possibilities for your creative projects. By ensuring you have the right Minecraft version, a compatible mod loader, and correctly placed mod files, you're now equipped with one of the most powerful building tools available in the Minecraft modding ecosystem.
Whether you're replicating a famous landmark, designing an elaborate farm, or simply aiming for unparalleled precision in your survival base, Litematica will streamline your workflow, minimize errors, and make complex builds more enjoyable. Take the time to explore its settings, learn its hotkeys, and experiment with its features, and you'll quickly wonder how you ever built without it.
Now, go forth and build with confidence, precision, and a whole new level of creative freedom! We hope this guide on installing Litematica for 1.21.8 empowers you to create your most ambitious Minecraft projects yet.